Audio Answers:
What is the proximity effect?
Question: “A friend told me not to record too close to the microphone although I think it sounds fuller. He mentioned the proximity effect? What is the proximity effect?”

What is the Proximity Effect?
The “proximity effect” sounds like technical jargon that is difficult to understand, but it’s actually a very simple thing. Simply put, as you get closer to a microphone your sound gets bassier. That’s basically what the proximity effect is. However, this simple effect can have drastic consequences when it comes to recording audio. For this reason, it’s very important that you understand the proximity effect in detail.
When it comes to technical terms, we like to define each word to make the term easier to understand. Proximity is defined as “nearness in space, time, or relationship,” and effect is, of course, “a change or consequence” of something. So “proximity effect” refers to the change/result of something as you get closer or further. In audio, the proximity effect refers to the change in tone as a sound source changes its distance from the microphone.
In most microphones, as you get closer to the capsule, the bass becomes more exaggerated. You experience an increasing low-end boost in your sound. You have probably experienced this before even if you’ve never thought about it. When you’re very close to a microphone, your voice sounds fuller, more bassy, but if you’re too close this bass boost sounds boomy and obnoxious. All of a sudden, you’re hearing a pop every time you say a word with a B or a P and your voice now sounds more bassy than the 808 in your favorite trap song. It’s like someone took an EQ and bumped up all the low-end in your voice.
The Benefits
However, it’s not only bad. The proximity effect is actually used quite strategically. DJs and radio announcers love to use it to fatten up their voice. You’ll hear dramatic use of it in action movie trailers all the time. The richer bass can make your voice sound more powerful. When it comes to recording music, you’ll want to carefully consider how to use the proximity effect. A good place to start is understanding which microphones have the proximity effect and which do not.
Which Microphones Have the Proximity Effect?
The majority of microphones suffer (or benefit) from the proximity effect, but not all are susceptible to this effect.
Directional microphones (such as cardioid mics) are affected by the proximity effect, but non-directional microphones (omnidirectional mics) are spared. Ribbon microphones are the most sensitive and will be most affected by the proximity effect. Basically, just about every mic designed for vocal recording is going to experience the proximity effect, but a small portion of mics such as omnidirectional room mics won’t.
Microphones are often designed with the proximity effect in mind as well. This can be why some microphones such as the Shure SM58 still sound balanced when sung into closely. Through design, microphones’ frequency responses can be tweaked to sound balanced at varying differences to compensate for the proximity effect. Although in the case of the SM58, a closer sweet spot means that it sounds thin and tinny at a much shorter distance away from it than most microphones. The designs of these microphones are shaping the way the proximity effect is perceived, particularly at which distance, but still, the effect is fully alive.
A Directional Mic with No Proximity Effect?
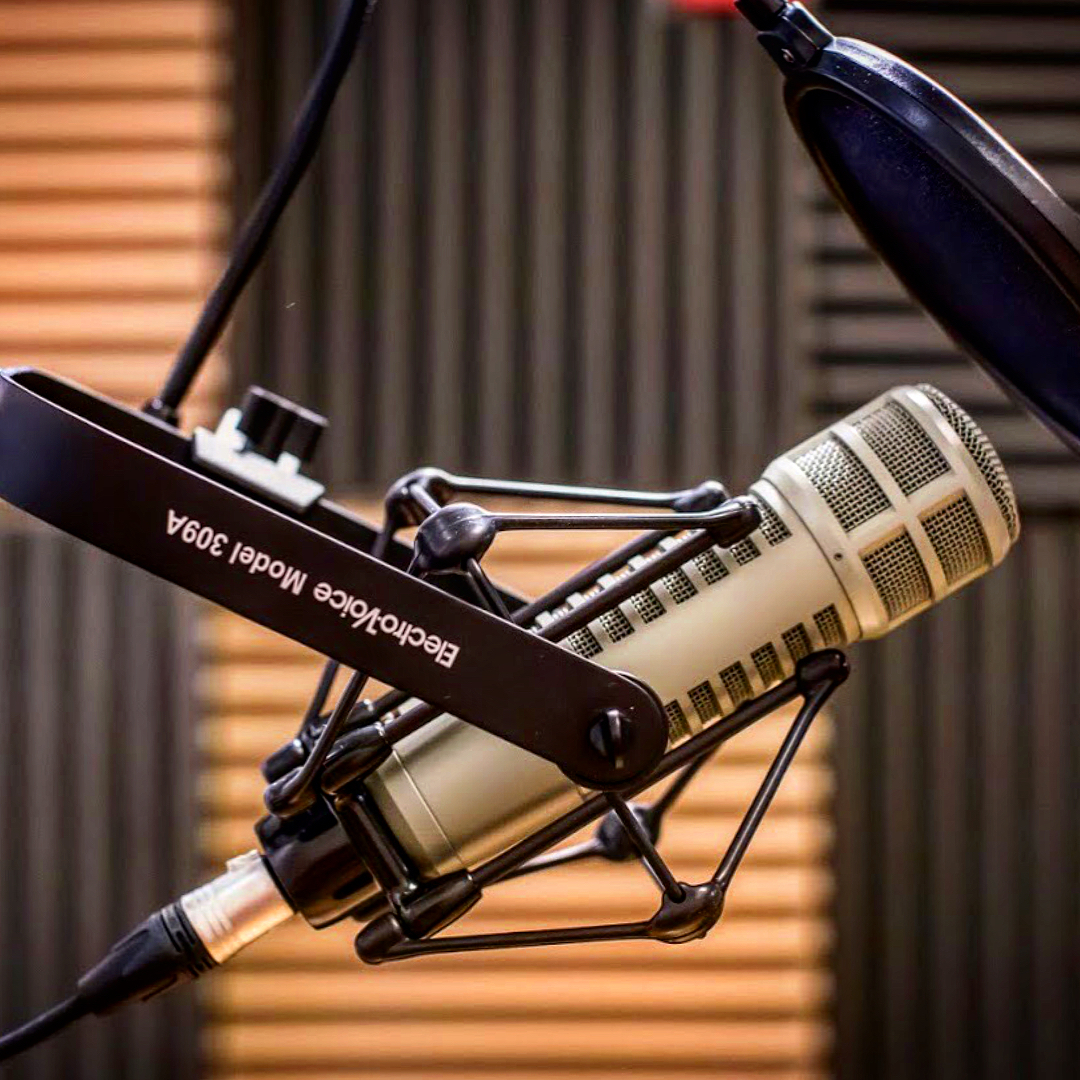
The best example of a directional microphone that has been engineered to minimize the proximity effect is the Electro-Voice RE20 dynamic microphone. Although its polar pattern is cardioid, its design allows it to share some of the qualities of an omnidirectional microphone. Electro-Voice’s signature “Variable-D” design (the D stands for distance) is what makes this possible. Even when off-axis, and at a wide range of distance, the RE20 retains its tonal qualities and does not fall victim to the proximity effect like most cardioid microphones. This makes the RE20 a very versatile microphone, from recording close up vocals, to a more distant choir.
If you’re interested in a high-quality directional microphone that won’t fall victim to the proximity effect, we recommend considering this microphone. The RE20 (see current price) can be especially useful to quiet vocalists who tend to get close to the mic while recording, or jittery vocalists who can’t stop moving.
Multi-pattern Mics
So, cardioid microphones are affected by the proximity effect and omnidirectional microphones are not, but what about multi-pattern microphones? Some microphones like the AKG C414 or Neumann U87, allow you to cycle between multiple polar patterns, including cardioid and omnidirectional patterns. “Shouldn’t I just be able to select the omnidirectional pattern and therefore, not experience the proximity effect?” In most cases, yes that’s right.
Although, multi-pattern microphones differ in capsule design from non-directional microphones, the way the omnidirectional pattern is created in a multi-pattern microphone, still results in no proximity effect. In multi-pattern microphones, the omnidirectional pattern is created through the use of two back-to-back cardioid capsules. Even though each cardioid capsule will have the proximity effect, the opposite polarities of the two capsules together will cancel each other out and result in no proximity effect.
The opposite is true if you were to switch to a figure-8 pattern. The polarities of the back-to-back capsules are added together instead of canceling each other out. This results in a proximity effect twice as strong as on the cardioid pattern. The figure-8 pattern will exhibit the greatest proximity effect followed by super cardioid, hyper cardioid, cardioid, subcardioid, then omnidirectional (which does not suffer from this effect).
Using this knowledge can help you choose the right microphone for your recording. We now know what the proximity effect is and which microphones are affected, but why does the proximity effect happen?
Why the Proximity Effect Happens
The reason why the proximity effect happens can be quite complicated. But, it comes down to how microphones respond to sound pressure.
Inside every microphone is a transducer (sometimes called an element). The transducer is responsible for the magic of recording audio. It takes sound pressure and converts it into an electrical signal. There are two types of transducers, pressure gradient transducers (found in directional microphones) and pressure transducers (found in non-directional microphones).
Pressure gradient transducers in directional mics, which exhibit the proximity effect, have a more open design with ports to create directional pickup patterns. Pressure gradient transducers respond to sound pressure differences between the front and back of the microphone diaphragm. Non-directional microphones have pressure transducers which are “closed-off” and thus only subject its front side to varying sound pressure.
Sound Pressure, Phase, Amplitude
Because of the difference in sound pressure and arrival times from the front to the back of the diaphragm, directional microphones are subject to phase differences which are frequency dependent. Because amplitude increases or decreases as a sound source gets closer or further from the microphone (the inverse square law), what happens is the microphone becomes more dependent on sound pressure levels from amplitude differences rather than phase differences (which are frequency dependent) as you get closer to the microphone.
Higher frequencies generally mean larger phase differences, resulting in greater pressure differences and greater output levels from the microphone. Because of this, higher frequencies are naturally over-represented. Due to the imbalance of higher frequencies over lower frequencies, mic diaphragms are damped to compensate and create a more neutral frequency response. This is most apparent at further distances when the diaphragm is depending more on sound pressure levels from phase differences rather than amplitude differences.
So basically, these exaggerated high frequencies (which are already damped through design) become even less of a factor as the diaphragm begins to be affected more by amplitude differences over phase differences as you move closer to the mic. As the sound source gets closer, this lessens the emphasis on higher frequencies and thus bass frequencies become more pronounced resulting in the proximity effect.
Handling the Proximity Effect
The effect can be quite dramatic depending on your microphone and distance from it. When close, you can experience a bass boost as high as 20db (frequencies under 100hz being affected the most). These are frequencies that are hardly present in the human voice and will do nothing but muddy up your mix when too prominent. The opposite is true as you move further from the microphone. As you increase your distance, you’ll shave off your low end and cause your sound to become weak and thin, lacking power and depth. Not handling the proximity effect correctly is one of the biggest mistakes amateurs make while recording.
Amateur Mistakes
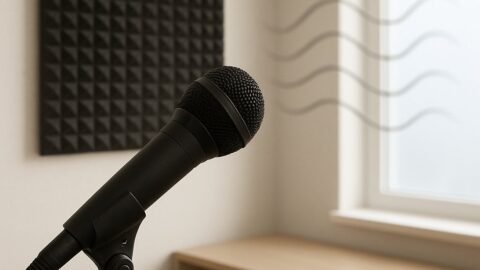
Beginners will often mistake the increasing volume of their vocals as they move closer to the mic as sounding better due to the bias for loudness, neglecting the balance of their vocal. Sometimes they have a somewhat logical reason for this as well. Beginners who have poorly treated rooms will usually try their best to record a vocal that is front and center without the ugly sound of their room. The worse your room sounds, the closer you’ll usually get to your microphone, resulting in greater proximity effect. This is doubly true if you’ve got a quiet vocalist.
The proximity effect will be an even bigger factor when recording male vocals and less of one while recording female vocals. Males typically have a vocal range that is significantly lower than females. As a result, the proximity effect can often make the bassy tone of a male vocal sound boomy and over-exaggerated. However, on the contrary, it can often bring out the fullness of a female vocal to great benefit.
Even if your ear is somewhat developed and you know a thing or two about recording, another mistake that is often made is judging the vocal or instrument your recording while solo’d. Your vocal, for example, may sound great if you’re listening to it alone, but once it’s in the mix it may be a different story. If you’ve captured too much low end due to the proximity effect, it’s going to be even more apparent when you listen back to your mix and you’ll likely hear bass instruments clashing with your vocal. Of course, this will result in an ugly muddy mess.
Never say I’ll “fix it in the mix”. You want to get your recording as balanced as possible on the way in. If it’s already too late, you can use EQ techniques to carefully roll off low-end. Multi-band compression can also be very helpful, allowing you to dynamically target the affected frequency range. But if you can help it, you’re always going to get better results through proper recording techniques resulting in a clear, punchy, and balanced mix.
Balance is Key
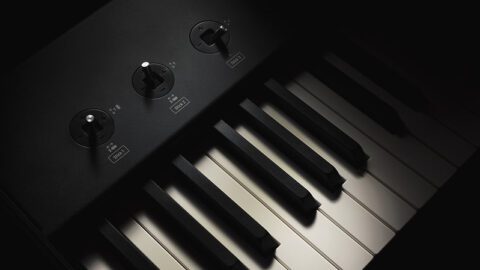
Every microphone has its own sweet spot. Often, this information is found in the manual of your microphone and can be very helpful to your recording. This is especially true if you’re a beginner who has not yet learned how to use their ears to properly gauge their distance from the microphone. Many microphones also have bass roll-off switches which can be very helpful to battling the proximity effect if you need to get a little closer to your microphone.
Depending on what you’re recording, it can also be helpful to use a combination of directional and omnidirectional mics to achieve the sound you want. By combining a high proximity effect microphone with a no-proximity effect microphone, you can often hone in on a more balanced tone, especially if you’re looking to capture some of your room’s sound.
Sometimes you’ll also have a really boomy sound source and using off-axis recording techniques can prove very helpful. One common example is while recording acoustic guitar. An acoustic guitar’s sound hole is the best place to capture the full sound of an acoustic guitar. However, it can also be one of the most annoying places to record. The high levels of sound pressure that come out of the sound hole can result in a very boomy and nasty sound due to the proximity effect. By placing your microphone off-axis, at different angles from the sound hole, you can reduce the boominess, while still retaining the full tone of the acoustic guitar. This is also one reason you often see the combination of multiple microphones when recording acoustic guitar. The combination allows you to blend the bassy sound from the soundhole with the clearer sound near the guitar neck.
Wrapping It Up
In all, it’s important to carefully consider the full context of your environment, sound source, and microphone while recording. The proximity effect is a huge factor in the sound you capture and once you know how it affects your sound, you can use it to your advantage. Knowing how to work with this effect is something you must master if you want great sounding recordings and mixes. We hope this article has helped you better understand the proximity effect and that you may be able to put this knowledge to good use in your recording.
Have a question you want answered? Ask us! Or join the Live Music Producer’s chat!
Have your own recommendations? Feel free to let us know in a comment below or reach us on our Twitter or our Instagram.


[…] On the rear panel’s right side, the C414 has a low cut filter. You can toggle between 0, 40, 80 and 160hz, allowing you to roll-off unnecessary low end in your recording signal. This can also be useful in scenarios where your recording source is too boomy, or to help battle an undesirable proximity effect. […]
[…] This can make it a little tougher to record boomy sound sources that are heavily affected by the proximity effect. This issue is exacerbated by the WA-14 not having a low-cut switch allowing you to roll off low […]
[…] bassy sources also applies when recording in close mic situations. It also does very well with its proximity effect relative to other condensers, resulting in a balanced sound even when recording very close to sound […]
[…] we could seem to find is that this microphone is prone to plosives and seems more affected by the proximity effect. We highly recommend using a pop-filter when recording with the […]
[…] amplifica su audio simplemente porque las ondas de sonido no tienen a dónde ir. Y junto con el efecto de proximidad , que dice que las frecuencias graves se vuelven más fuertes cuanto más cerca está de una fuente […]
[…] усиленный бас называется в эффект близости– когда источник звука находится […]
[…] proximity effect is something that happens when a sound source is placed very close to a directional microphone. It […]