10 Cheap Music Studio Improvements

Music Studio of @realrodpires
The Need to Improve Your Studio
As music producers, we’re always looking for the next upgrade, the next improvement to give us an edge in our home music studios. These upgrades and improvements can become expensive very quickly. But surprisingly, there are a number of cheap and affordable improvements that can be made to your home music studio that you might not ever consider.
Below, we list our 10 cheap music studio improvements; these affordable studio improvements can offer significant value to your studio, in a variety of ways, without breaking the bank. Some will be best for improving your new home studio on a budget, and others will be better as extra improvements that you can make if you have already established your home music studio.
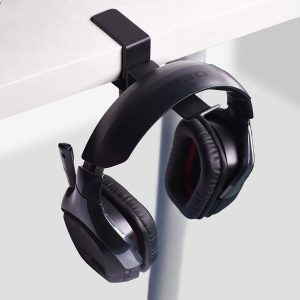
1. Headphone Holder
Keep Those Headphones Secure and Organized
How many times have you had your headphones fall on the floor? If you’re lucky, they’re built tough and can withstand a beating. However, not every pair of headphones are built like the HD280’s. If you’re using expensive headphones, it’s especially critical that you protect your precious studio investment.
Not only will headphone holders keep your headphones protected from falls that might damage and harm your headphones, but they’ll also help keep your studio organized, looking tidy and neat. At $10-20 in most cases, headphone holders are a cheap studio improvement that will help protect your valuable headphones.
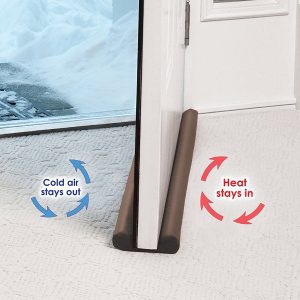
2. Door Draft Stopper
Stop the Air and You’ll Stop the Sound
Most people buy door draft stoppers as seen above, to help regulate the temperature in a room. They can help keep the cold outside air from entering your room, for example. But remember, if you stop the flow of air, you’ll also help stop the flow of sound; and this is why a door draft stopper can be particularly useful in your home studio.
There are many undesirable noises that can enter your home studio. Whether it be your noisy roommates, the hum of the refrigerator in your kitchen, or the dryer in your laundry room, a simple door draft stopper can help limit the amount of undesirable noise that enters your studio. The last thing you want is these ugly sounds showing up in the recording you worked hard on.
While you may not be able to silence the sound of your roommates throwing a loud dance party outside of your studio room with this simple item, every little improvement matters. That’s why purchasing a door draft stopper is a cheap studio improvement that we recommend, and one that can have a great impact on the quality of your studio recordings.
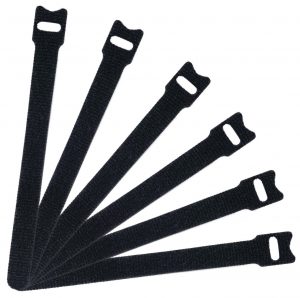
3. Fastening Cable Ties
Manage Those Wild Cables
This next cheap studio improvement will likely have no effect on the sound of your studio, but as most music producers can relate to, the organization and look of your studio can also be of great importance. A studio with tangled up cables can create chaos and disorganization, slowing down your workflow, and possibly harm the experience of working with in-studio clients and collaborators.
Fastening cable ties are a useful way to keep cables organized and tidy. Whether it’s cables that you’re storing, one of which you may need to quickly grab during a studio session, or a matter of keeping cables that are going from gear-to-gear neat and clean. You can purchase a 50-pack for under $10. This is a cheap price to pay to boost your workflow and aesthetic environment, factors that can affect your comfort, creativity, and ultimately, your production.

4. Tabletop Cupholder
Prevent a Studio Disaster
“A cupholder?? I thought this article was about studio improvements?”. You may not realize it now, but you probably need a cupholder in your studio. Many of us, practically live in our home studios. Often, you’d like to just kick back and enjoy a drink while you produce or mix a track. Whether it be coffee to boost your energy and stimulate your workflow, or cold beers to drink while you and your friends come up with new creative ideas; there’s one thing you’re risking when doing this, a disastrous spill.
The worst-case scenario is spilling your beverage over a precious piece of studio gear. That’s exactly what I did years ago in my home studio. The drink was a full cup of coffee and the gear was a 16-channel analog mixer sitting on my studio desk.
Frantically running to grab a towel, wiping coffee from this important piece of gear, turning it upside down, disassembling it, towel-drying what I could, letting it air-dry for 3 days, and praying there was not any permanent damage was not in my schedule and paralyzed my workflow until this gear could be put back into action.
Thankfully, the mixer turned out mostly fine. The scent of dried coffee inside the mixer did linger in the air for a few days, and the faders never moved as smoothly as they once did. However, it could have been a lot worse. After this disaster, it was clear what I needed – a cupholder. I wasted no time with my purchase. However, the PTSD of the coffee spill still returns from time to time. Let this be a cautionary tale and another cheap studio improvement worth making.
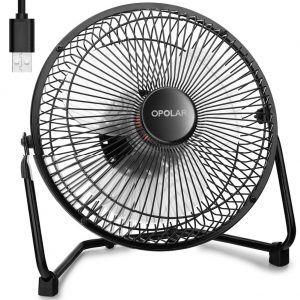
5. Ultra Silent USB Fan
Keep Cool Without the Noise
Studios can get especially hot. Even in the middle of Winter, if you’ve got enough heat-generating gear in your studio, the room can quickly heat up. Most of the time you want the door in your studio closed for obvious reasons, and that causes the room to get even hotter, especially if you’ve got a door draft stopper installed as we recommended above.
To remedy this, you could turn on the AC, but the AC is usually noisy, and most of the time you’re cooling down the entire house way more than needed just for your studio room. That’s not efficient and can be pretty costly.
The obvious solution is having a fan inside your studio. But, what’s the problem? The problem is fans can generate a lot of undesirable noise. You want to make your studio comfortable, but you also want it to be as quiet as possible. Luckily, not every fan is equal.
We first learned about the near-silent Opolar USB fan from a great YouTube review by Creative Sound Lab. We followed Ryan Earnhardt’s advice, purchasing this fan, and his claims are true. It’s simply the quietest room fan we’ve ever experienced.
Ultra-silent and powered by USB, this fan by Opolar will keep you and any possible clients comfortable during recording while maintaining a quiet recording environment. At under $25 this is another cheap studio improvement that can become a great asset to your studio. You might even save some money on your electricity bills, by keeping off that AC. You know what that means – more money for studio gear, of course.
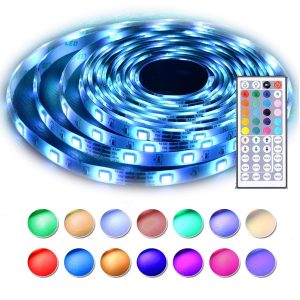 6. Multi-color LED Strip with Remote Control
Let there Be Light
There seems to be a consensus that your music studio is incomplete without great lighting. This may just be for the looks, but you probably love your studio and want it to be as flashy and eye-pleasing as possible. Having a great looking studio will improve the impression your clients have of it and could earn you some points.
If you’ve seen other music studios across the internet or in-person, you’ll probably note that at least half of them seem to incorporate colored LED lighting. Take a look at the various music studios that we’ve featured in our Studio of the Week collection and you’ll see what we mean!
There’s good reason LED lighting has become so popular. It’s very cheap to purchase, easy to install, and can quickly turn a boring music studio into something exciting. You can purchase a 16-foot strip for around $20. Most kits include a remote control which allows you to select the color that you desire for your lights. There are also other functions which can allow your lights to slowly fade through all the colors or quickly flash through many, for example.
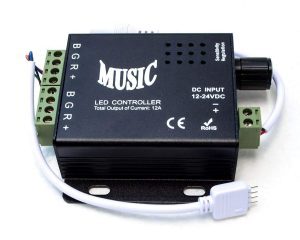 If you want to take your LED lighting to the next level, you can also add on the LED strip music controller. This controller connects to your existing LED strip and will allow your LED lighting to flash and respond in accordance to the music it hears and detects in the room.
Colored LED lighting is a cheap studio improvement that can be made to immediately improve the aesthetics of your studio. You’re going to enjoy the flashy look it provides to your studio (unless of course, you’re operating a country-folk music studio). That might just confuse your clients…
So after you’ve purchased the LED lights from above, you may have a slight problem now. Your studio is too bright with the room’s ceiling light on and now your colored LED lighting doesn’t look as cool. And when you turn off your room light, the LED lighting looks great, but the room is now too dark to comfortably work.
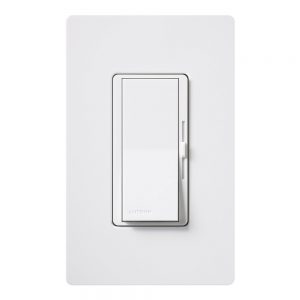 This problem is easily solved by installing a light bulb dimmer. They’re cheap and relatively easy to install. You’ll keep your studio looking awesome, while still being practical about the lighting conditions.
If you’re working with clients, the reality is they often put more weight on how your studio looks rather than more practical factors; this is due to their lack of knowledge of studios and equipment. This means with some cheap studio improvements such as installing a dimmer, you can keep the impression of your studio up and maybe even have a positive effect on your business if you’re recording and producing for clients.
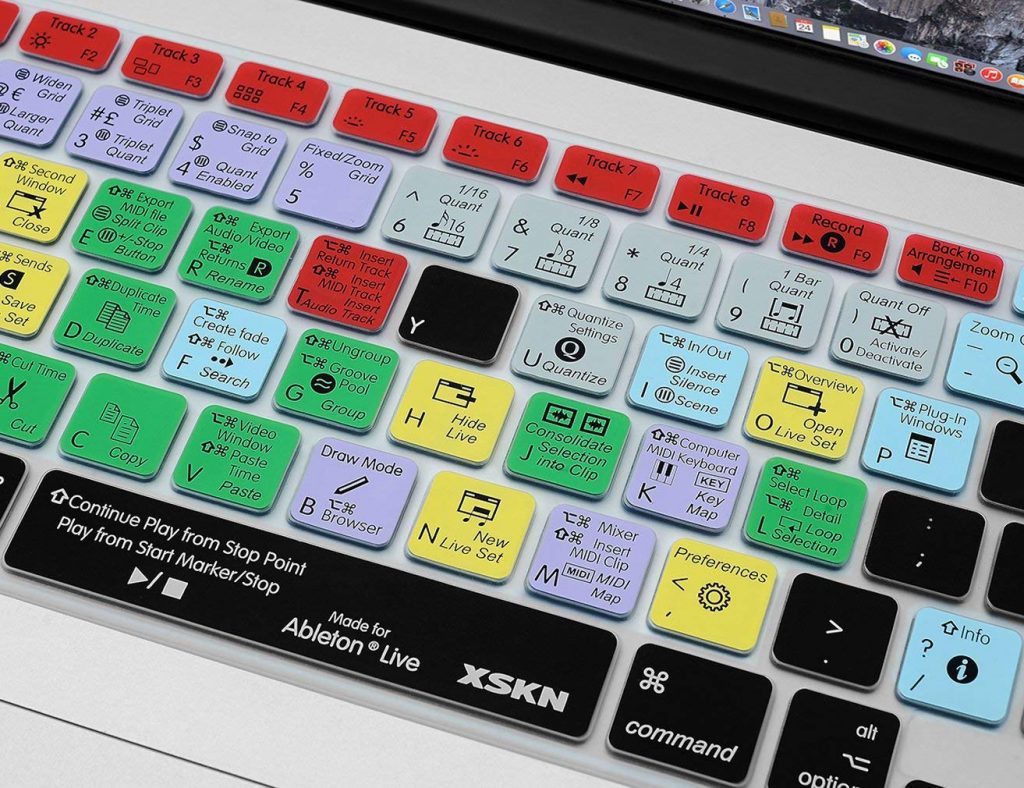
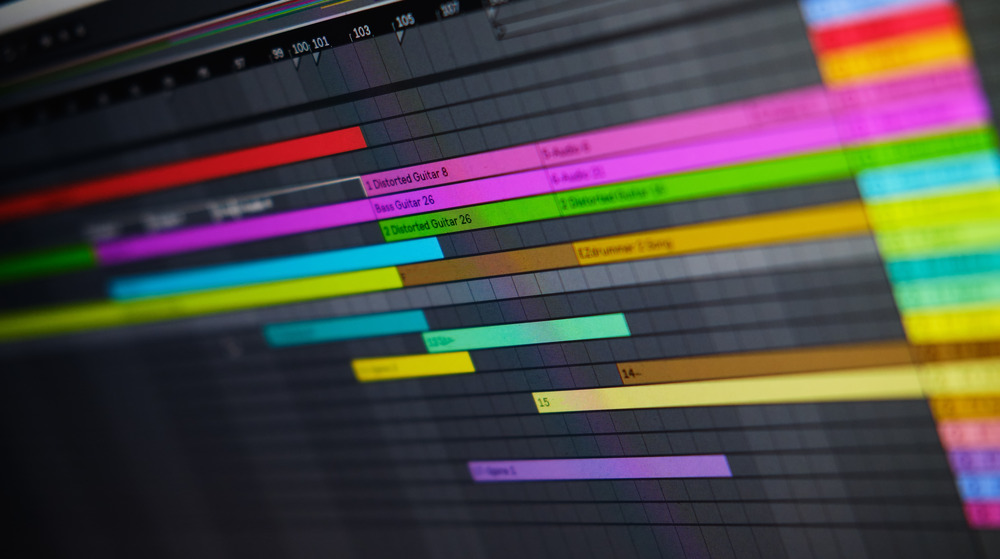
7. Keyboard Skins for Your DAW
Speed Up Your Workflow
The importance of an efficient workflow is often understated in music production. When you’re able to produce with efficiency, you maintain your creative energy and can capture your ideas more effectively. Many of us are highly familiar with our DAW’s, but few of us take the time to learn the various keyboard shortcuts and hotkeys of our DAW even though we know of their power to speed up our music production workflow.
Keyboard skins designed for your DAW make this process a lot smoother and are available for just about any DAW. Whether it’s a keyboard skin designed for Pro Tools or Ableton, they’re a great way to become familiar with all of your DAW’s shortcuts and can greatly improve the way you produce. At $10-15 per skin, keyboard skins designed for your DAW are a cheap studio improvement that can offer great benefit to your workflow.
If you want to learn more about DAW keyboard skins, including additional hardware keyboards designed for various DAW’s, we covered this and more in our article here.
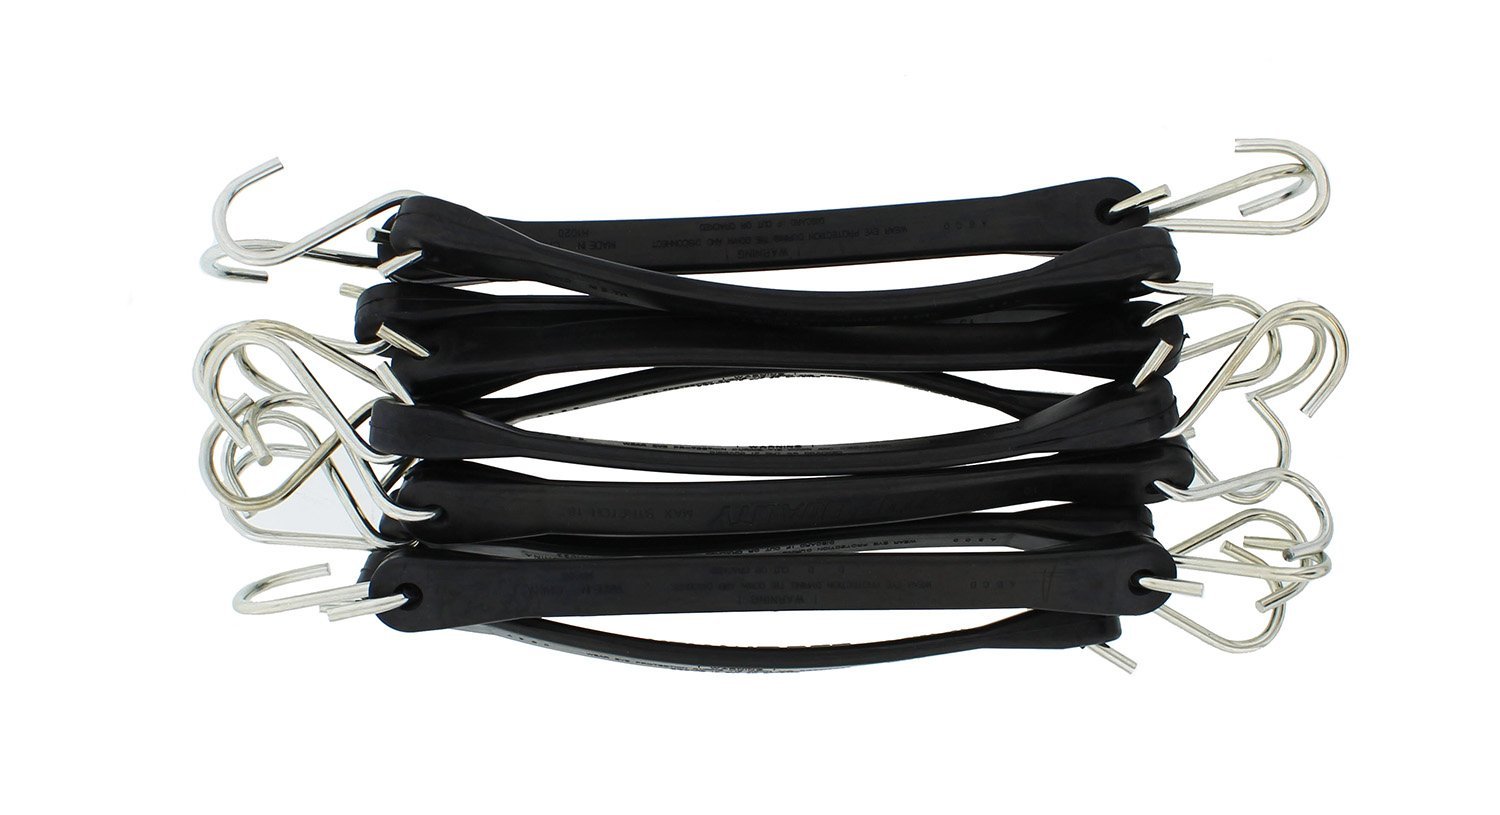
8. Rubber Bungee Cord
It’s Not What You Think
“A rubber bungee cord? Really? What are we gonna use that for? To wrap our cables? Secure our gear?”. No, that’s not why we’re listing this item. The application of this useful rubber bungee cord is much more complex, and will greatly affect the room acoustics of your studio.
If you have experience recording and mixing audio, you might notice the unpleasant ringing of various objects in the studio during certain parts of a captured recording. What you’re hearing are nasty resonant frequencies, and the culprit is usually various metallic surfaces in your studio.
A simple way to quickly test for resonant frequencies is to slowly walk around your room and shout towards various objects. You might look like a mad-man, but if you find that after you shout, you hear a nasty echo or ringing in an object, then you’ve got a resonant object in your studio and that needs to be taken care of, or you risk ruining your studio recordings.
The key is to muffle and effectively stop the vibration of the resonant object. The object, for example, could be the metal pole on a floor lamp, or the metal base of your office chair. We personally found this resonant ringing coming from the aluminum side panels on our studio desk which houses our rack gear. One tap on the desk or loud noise in the direction of the desk, and you could hear the metallic ringing of these panels. What did we do to solve this issue? Simple, we implemented the use of the above handy-dandy rubber bungee cord.
It’s simple. You just want to stretch this rubber bungee cord out and use the hooks to tightly secure it onto whatever surface is ringing, either by latching onto its own hooks or finding two points for the cord to latch onto. With the rubber cord tightly around the surface of a resonant object, the vibrations of the surface are disrupted, and what you get is a ring-free surface that will help improve the quality of your in-studio audio recordings.
An experienced producer knows that one of the tell-tale signs of an amateur recording is hearing resonant ringing from the room within the audio. You might even see a studio that has great acoustic treatment on the walls, but they’ve overlooked the various reflective and resonant objects within the room itself. Rubber bungee cords are a cheap studio improvement that if used wisely, can greatly enhance the room acoustics within your studio without being too intrusive to the look of your studio.
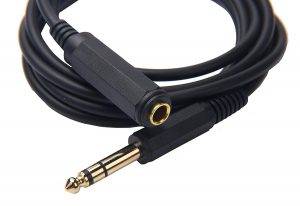
9. Stereo Extension Cable
Be Flexible and Prepared
You may not need one now, but a 1/4 stereo extension cable can become incredibly useful inside your studio. One of the most obvious uses is to use as an extension cable to extend the reach of your studio headphones. When you’re in a recording session, you never know what kind of obstacles you’re going to encounter. It’s better to be prepared than to later regret not having the capacity to achieve something critical to the recording process.
I personally encountered this difficult-to-predict obstacle and was not prepared. During a recording session, while micing a guitar amp and attempting to record a client, it became clear that the acoustics in the treated studio room were not going to result in the best-sounding guitar amp recording. The amp needed a wide-open room, that had some nice reverb to it, in order for the sound to flow freely and more naturally. The solution was to move the amp into the next room which was very large and had a nice wide-open sound to it.
We got everything set up only to realize that we would be unable to test different mic positions while monitoring through headphones due to the length of the headphone cable we had. It had never occurred to me before that I’d need ever need an extra-long stereo extension cable.
My headphone cable was plenty long enough for anywhere inside the studio, but we were implementing a recording strategy that we did not predict. Unfortunately, this ultimately resulted in having to get creative and created an unpleasant studio-client experience.
You don’t know what you need until you need it. If the cost is cheap, it’s worth the purchase to be prepared. You’ll find clients who often also have unconventional recording requests as well. After purchasing a stereo extension cable, being able to adjust mic positions from another room while monitoring through your headphones, will not be a worry. This is just one among many various studio scenarios that could arise. That’s why a stereo extension cable could be another useful cheap studio improvement for you and your studio.
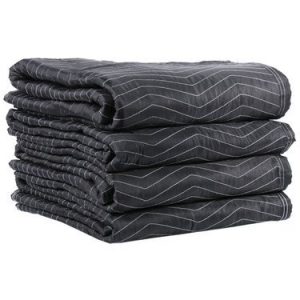 10. Moving Blankets
The Most Affordable Acoustic Treatment Solution?
Last, but certainly not least, moving blankets. This may be the most useful and effective of the above cheap studio improvements. If you’re building your home music studio, you know how expensive acoustic treatment can be. Even the most affordable brands in acoustic treatment can break the bank, and usually, don’t do the best job, or cover a wide area of your room.
While you shouldn’t expect moving blankets to be as effective as expensive high-density fiberglass acoustic panels, they’re a great solution for an untreated studio room on a budget and can solve a huge deal of problems with acoustic reflections in your room.
We were ultimately sold on the effectiveness of moving blankets after watching the below video from Byte My Bits which shows a great comparison of the quality of audio recorded before adding moving blankets to his room, and the difference it made after adding them. You can listen to the difference for yourself in the video shown below:
As you can hear, there was a significant improvement in the captured vocal recording after hanging moving blankets on the wall. The apparent reflections in the room mostly disappeared and that nasty echo around the voice was virtually wiped out.
Moving blankets are light enough to hang on your walls with large thumbtacks and are incredibly cheap and affordable for the improvement they offer to the sound and room acoustics of your studio. You can purchase a 4-pack of 72″ by 80″ blankets for around $30. We have yet to find a more effective way to treat a room at this very low price, and that’s why this cheap studio improvement has our highest recommendation.
Wrapping Up
With our 10 cheap studio improvements listed above, we hope that there’s something on our list that is useful to you and can improve your home music studio. Often a cheap improvement can be much more effective and offer more value than an expensive one if utilized effectively.
Before you go rushing to purchase a new microphone to improve your recordings, you want to make sure you’re considering all the deficiencies in your studio. You could spend $200+ on a new microphone, but you might be able to make a more effective improvement to your recordings by choosing to tackle those nasty acoustic reflections and resonant objects in your studio at a fifth of the price.
Either way, the choice is yours. Ask yourself the right questions and you’ll be on your way to making the right studio improvements. We wish you the best in building and improving your home music studio. Take it one step at a time and enjoy producing.
Have your own recommendations? Feel free to let us know in a comment below or reach us on our Twitter or our Instagram.


Oh man I really would need that fan right now, it’s so hot upstairs that when you wanna go down you start to question if you just walked into a fridge, or if its your room that has been converted into a sauna.