You finally record a vocal you’re happy with. Then you play it next to a song you love, and yours sounds like it was sung in a bathroom: thin, boxy, a little hollow, with a faint ring around every word.
That’s the room, not your mic and not your voice. Most bedrooms are small boxes with hard, flat walls, and sound bounces around them before it reaches the microphone or your ears. Acoustic treatment is how you stop it. Whether you need it, and how much, depends on how you record and how you listen.
The two problems treatment fixes
Treatment does two different jobs, and it helps to keep them apart.
The first is the room in your recordings. A microphone points at you, so it also points at whatever is behind you. Your voice travels past you, hits the wall, and comes straight back into the front of the mic a split second late. That late copy is the boxy, hollow sound.
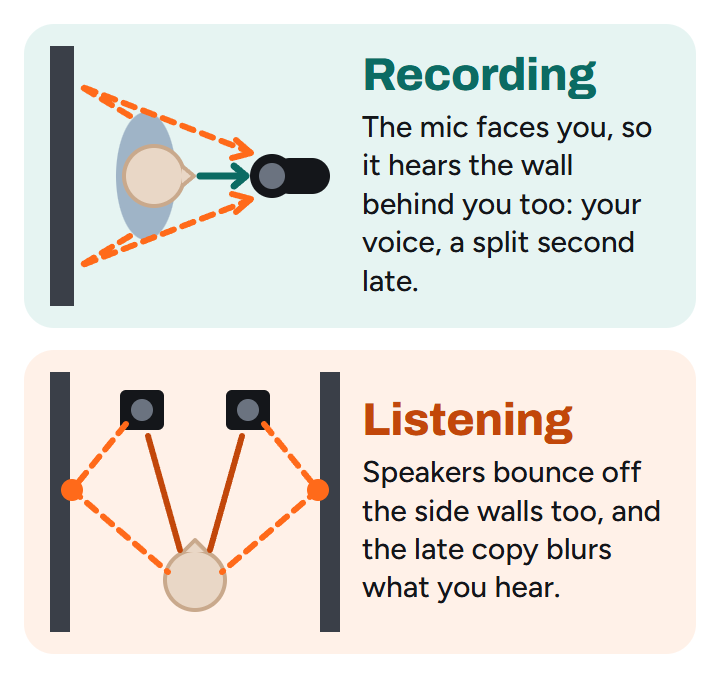
The second is the room between your speakers and your ears. Sound from each speaker reaches you directly, then again off the side walls, the desk and the ceiling. Those reflections smear the detail and the stereo picture. Small rooms also pile up bass in some spots and lose it in others, so a mix that sounds right at your desk can sound boomy or thin everywhere else.
Plenty of beginners only have one of these problems. Here’s how to tell which.
Do you need it?
Not yet, if you record with a dynamic mic up close and mix on headphones. A dynamic mic like the SM58 hears what’s right in front of it and very little of the room (our dynamic vs condenser guide explains why), and headphones take the room out of listening altogether. A rug and a duvet will do.
Yes, a little, if you record with a condenser. Condensers are sensitive, which is why they sound detailed, and why they hear every wall. If you’re eyeing one from our best condenser mics at every price guide, treat the space around the mic first.
Yes, if you mix on speakers. Studio monitors are only as honest as the room they play in. Without some treatment, you’re mixing the room as much as the music.
Not sure? Record ten seconds of talking where you usually sing, then do it again with a duvet hanging behind you. If the second take sounds clearer and closer, the room is in your recordings.
Start free: furniture, a rug and a duvet
Before you spend anything, use what’s already in the house. Soft, thick and uneven things soak up and scatter sound: a sofa, a full bookcase, a bed, heavy curtains, a rug on a hard floor. Moving them around changes more than you’d think, and our piece on how rearranging furniture changes your room’s acoustics shows what to try.
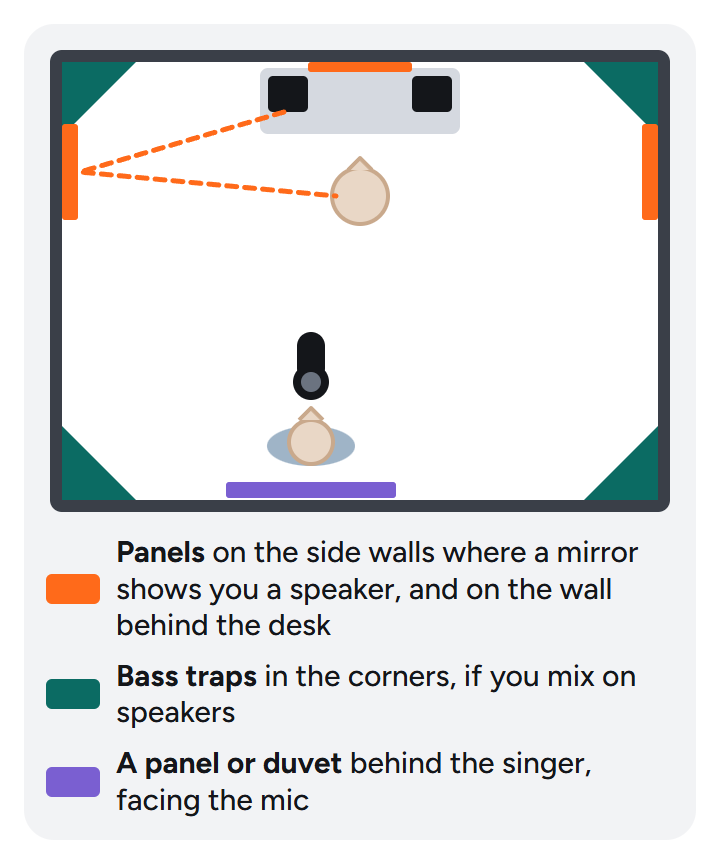
For vocals, the best cheap trick in home recording is a thick duvet hung a couple of feet behind you while you sing, over a door, a clothes rail or a spare mic stand. Remember the diagram: the mic faces you, so the wall behind you is what it hears best. Sound On Sound has championed the duvet for years and rates it far above the small reflection filters that clip on behind a mic.
A walk-in closet full of clothes works for the same reason. It isn’t glamorous, but it’s quiet and dry, and it’s a lifesaver in a noisy home (more ideas in how to record clean audio in a noisy room).
Why foam squares disappoint
A box of foam squares is the first thing most of us buy, and it’s easy to see why. It’s cheap, it looks like a studio, and when you clap in the room afterwards the ringing echo is gone. Job done?
Not quite. Thin foam soaks up high frequencies, the ones you hear in a clap, and does very little to the lows and low mids. That’s where small rooms have their real trouble: the boom that builds up in the corners, and the boxy sound a vocal picks up from walls close by. Cover the walls in thin foam and you can end up with a room that sounds dull and boomy at the same time.
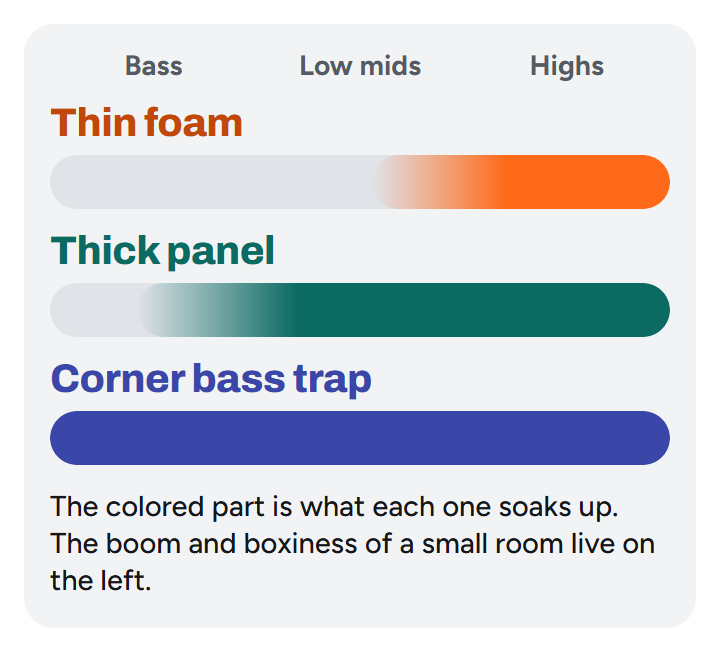
What works is thickness. A panel a few inches thick, made of mineral wool or dense fiberglass and wrapped in fabric, absorbs well down into the low mids, and a thick one in a corner starts to tame the bass. You need far fewer of them than you’d need foam squares.
As for egg boxes, they’re thinner still. Like foam, they catch a little of the mids and highs, unevenly, and nothing like a real panel does.
Where panels and bass traps go
When free isn’t enough, a few thick panels in the right places do more than a room full of anything else. Put them where they count, in this order.
Behind the singer. If you record vocals, one panel behind where you stand does the duvet’s job permanently, facing the mic.
At the first reflection points. If you mix on speakers, sit in your mixing chair and have someone slide a small mirror along the side wall at ear height. Wherever you can see a speaker in the mirror, that’s where its sound bounces to you. Hang a panel there on both side walls, and one on the wall behind the desk.
Bass traps in the corners. Bass builds up where walls meet, so corners are where thick absorbers do the most against boom. Start with the two corners behind your desk. You only need them if you mix on speakers: on headphones, the room’s bass problems don’t reach you.
How thick? For panels, around three to four inches of mineral wool or fiberglass, ideally with a small air gap behind, makes a solid all-rounder. Corner traps go thicker still. Thinner panels mostly tame the high end, just like foam.
Buy or build?
Ready-made panels cost more but take minutes to hang. Building your own is the cheapest way to get real thickness, if you have a free weekend.
Ready-made panels: ATS Acoustic Panel, 4 inch
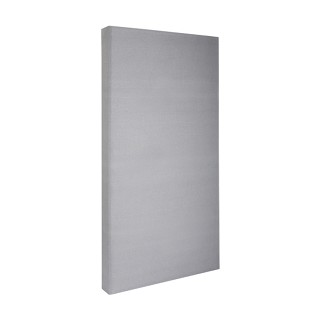
ATS Acoustics’ 4-inch panel is the one we’d buy. It’s a two-by-four-foot slab of Rockwool mineral wool in a wood frame, wrapped in fabric in a choice of colors, and it hangs flat on the wall from the clips in the box. ATS publishes lab results for it, and they show it still soaking up most of the sound at 125 Hz, where the same panel at 2 inches thick barely does anything. That’s the thickness at work.
The catch: you’ll want several, and they add up faster than a box of foam. Start with one behind the vocal spot and two at the side-wall reflection points, and add more only if you can still hear the room.
For the corners: ATS Corner Bass Trap
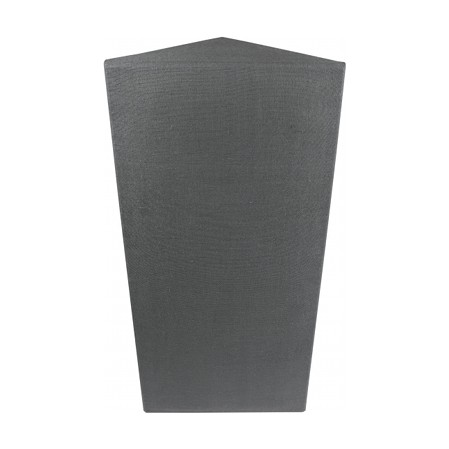
ATS’s corner trap is a four-foot-tall block of Rockwool, 13 inches deep, that stands in a corner. In the lab it was still absorbing at 50 Hz, the region bedrooms struggle with most. ATS adds that it works a little better on the lows with a small gap behind it than pushed hard into the corner.
The catch: it’s big, about 40 pounds, and it isn’t cheap. Buy them only if you mix on speakers, and start with the two corners behind your desk.
Building your own
A homemade panel is a rigid board of mineral wool or fiberglass in a simple wooden frame, wrapped in breathable fabric (if you can blow through it, sound can get in). It’s the cheapest way to get thick panels, and it’s a weekend’s work. Wear gloves and a mask while you cut the boards, and wrap them fully so no fibers end up in the air you breathe.
So, do you need it?
If you record a dynamic mic up close and mix on headphones, not yet: a rug and a duvet will do. If you record with a condenser or mix on speakers, yes, but start free, then put a few thick panels where they count, and skip the foam. And if you’re torn between headphones and speakers for mixing in an untreated room, our guide to mixing with headphones vs speakers will help you choose.
Happy producing.